Theme images by MichaelJay. Powered by Blogger.

Comments

Facebook

Contributors

Ad Home

Follow Us

Random Posts

Sponsor

Recent Posts

Header Ads

Popular Posts

Random Posts

Monday, March 13, 2017

How to connect your Android device to a printer (step by step guide)


Printing on Android used to mean installing the janky Google Cloud Print app, then “sharing” whatever it is you’re trying to print with that app. It was a really roundabout and not-at-all-intuitive way to go about printing things from mobile. It just didn’t make sense.
Today, in the modern world, printing is so much simpler, because it’s baked into the operating system and most of your apps. Really, that’s the only limitation you need to consider: the app has to support printing. For example, you won’t be printing any Facebook posts from the mobile app, because it doesn’t support that feature. You’ll really find it in places that make sense: Gmail, Google Docs, photos, and so on.
So, while printing on Android has gotten significantly easier over the past few years, there are still some things to be aware of.

How to Add and Manage Printers

Like I said earlier, Cloud Print is now part of the OS. In the past, this app is where you’d go to find and manage printers, but since it’s no longer a standalone product, all that stuff is now tucked away neatly in the Settings menu.
To check your printer situation, first pull down the notification shade and hit the cog icon. On some devices, like anything running stock Android, you may need to pull it twice. This will get you into the Settings menu.
Screenshot_20160919-091420
Now, this is where things can get hairy: every manufacturer seems to hide the setting we’re looking for in a different place. So, for the sake of simplicity and universal acceptance, we’re going to do this the easy way: tap the magnifying glass icon (or the word “Search” on Samsung handsets), then search for “Printing.”
Screenshot_20160919-091428Screenshot_20160919-091439
Regardless of where the setting is on your specific phone, the option should pop up. Tap that guy and be thankful for the search tool. It just saved you a lot of hassle.
Now that you’re there, some options may or may not be available. For example, Cloud Print should be there regardless of which type of device you have. But there are also some specifics, like “Samsung Print Service Plugin” which will be available on Samsung devices, as well as other devices if you’ve had a Samsung device before. It’s interesting.
Screenshot_20160919-091445
Regardless of how many options are listed here, the result is still the same: this is where you manage your printing options. More often than not, you’re going to just use Cloud Print for most everything, because it’s the most prolific on Android.
If you’d like to manage your printers, tap on “Cloud Print,” then the three-button overflow menu in the top right (on Samsung devices, it may read “MORE”).
Screenshot_20160919-091450
This is where you can choose to add a printer to your Cloud—just select “Add printer.” The app will automatically start searching for printers on your local network. If it’s already a part of cloud print, then it won’t show up here, which will help you avoid duplicates.
NOTE: Cloud Print only works with printers that are connected to your network directly over Wi-Fi or Ethernet. If you’re sharing a printer connected to a Windows computer, for example, it won’t work–but we have some other options for you at the end of this post.
Screenshot_20160919-091456Screenshot_20160919-091750
If you’re not looking to add a printer, though, just tap “Settings” instead of “Add printer.”
In the Settings menu, you can change things like printer visibility for specific accounts—for example, if you have a work email and printers on your device, but don’t want those printers to display in your list, simple jump into that account and change the visibility. You can also choose to show only printers that you’ve used recently.
Screenshot_20160919-091502Screenshot_20160919-091909
Otherwise, this is where you’ll manage print jobs and printers. It’s all really straightforward.
Screenshot_20160919-091509

How to Print in Supported Applications

Okay, so now that you know how to add and manage printers, let’s talk about actually printing something from your phone. Like I said earlier, only some apps support printing. Pretty much any office-based applications, like Word, Docs, Excel, Spreadsheets, Gmail, etc. will work for you, but Google’s Photos app also supports printing.
The thing is, it’s kind of hidden in certain apps. For example, it’s pretty front-and-center in Photos—just tap the three-button overflow menu, then “Print.” So simple.
Screenshot_20160919-095653
In Sheets or Docs, however, it’s not as simple. In those apps, you have to first tap the three-button menu, then select “Share & Export.” From there, “Print” will be an option.
Screenshot_20160919-092432 Screenshot_20160919-092439
From there, the Cloud Print app will open, with your default printer pre-selected. You can change things like the number of copies to print, paper size and orientation, and color. To modify those settings, just tap the little arrow at the bottom of the print header.
Screenshot_20160919-095909 Screenshot_20160919-092627
If you have multiple printers installed, you can select from the list by tapping the printer name at the top of the header. A list of everything installed or available to the print service will show up here, including all available printers.
Screenshot_20160919-092829
Once you’ve locked in all your options, tap the little print button. It should automatically send the document to your printer, and you’re good to go. That’s pretty much that!

How to “Print” to PDF

Sometimes you may not need an actual paper copy of something, but you want a universally accepted document that will just work wherever you need it. For that kind of thing, PDFs are great. And printing to PDF is stupid-easy on Android.
Select the print option outlined in the above section, then tap the drop-down menu with all of your available printer options. There should be at least a couple of options for saving the file as a PDF: “Save as PDF,” which saves the file locally to the Android device, and “Save to Google Drive” which will save the PDF to your Google Drive.
Screenshot_20160919-092829
Once you’ve selected the appropriate option here, just tap the print button.
If you choose to save the file locally, a “Save as”-esque dialog will appear. Just save the file wherever you’d like.
Screenshot_20160919-100312
If you choose to save the PDF to Drive, the print window will just close and appear to do nothing. That’s not the case, however, as the document should be available in your Drive’s root folder. It’s silly that no save options are available, but alas, that’s how it is.

Print to Specific Brands of Printer

Many popular printer brands will also offer a companion app for their hardware, allowing you to access more advanced functionality.
The best thing to do in this case is just jump into the Play Store and search for your specific brand of printer. Unfortunately, everything from this point forward is going to be very brand-specific, so some independent research may be necessary on your part, especially if you’re trying to do something specific.
2016-09-19_10h04_10
For what it’s worth, I’ve found very little value in most manufacturers’ apps, as they often just offer redundant features that can already be done directly from Cloud Print. That said, some of the apps will let you do things like scan and fax directly from the phone, so it’s at least worth exploring. Godspeed.

Print Directly to USB, Bluetooth, or Networked Printer

So let’s say you have an old networked printer that is shared on a Windows network. Alternately, you may have a printer you want to physically connect to your Android phone or tablet via a USB OTG cable. Or, you may have a wireless printer that connects over Bluetooth.
All of these types of printers—USB, Bluetooth, and Windows network—are unsupported by Android. Google recommends setting up Cloud Print on a PC connected to such a printer. Android doesn’t include any support at all for these types of printers.
If you want to print to such a printer directly, you will have to use a third-party app. Unfortunately, there aren’t any available high-quality apps that do this for free. PrinterShare is a well-reviewed app that can print to Windows network share printers, Bluetooth printers, and even USB printers via a USB OTG cable. Unfortunately, if you want to use these advanced features you’ll have to pay about $10 for PrinterShare premium. Luckily, you can print test documents with the free app to test if your printer configuration is supported. This isn’t the ideal solution—Android’s built-in options are—but if you really need this feature, you’ll have to pay for the privilege. It’s a hard-knock life.
2016-09-19_09h51_21

Printing on Android has come a long way, and the odds of having exactly what you need at your fingertips are pretty good at this point. Cloud Print’s integrated options are generally pretty reliable, but there are also options out there should you need to print from an unsupported printer, like a Windows shared or Bluetooth printer.

Saturday, March 11, 2017

how to create PDF files on Android

 
It has become much of a trend, both formally and informally to have documents read, presented in PDF formats on Android phones. Most people don't know how to read word or excel documents on mobile devices but they know how to read PDF on Android phones. So creating PDF documents directly on Android will save lots of time. And there are chances that people have to create PDF documents on their Android phones with Android PDF Creator and send to their clients when they are out of office. What you need is just a Android PDF creator app to be installed on your Android phones.
You may want to highlight the important points, add some explanation wherever needed and cross out unnecessary stuffs. PDF annotation software allows you to highlight PDF, add notes to PDF files, and underline your PDF files.
Additionally, the recent popularity of Androids and tablets meant more people want to read and take notes through the smartphone. This demand for PDF annotation apps brought forth a flurry of such apps in Android devices.

1. Foxit PDF Creator

foxit-pdf-creator.jpg
Foxit PDF creator is a Android PDF Creator app and most people get to know this Android app from their desktop PDF reader. It is one of the PDF software brand and its desktop software has got wide popularity. It is a PDF creation app that converts Microsoft Office documents and other file formats to PDF. The app not only allows users to convert almost all file formats stored on the device but also on external SD cards. You can also rename, delete, and manage PDF files, as well as send PDF files as email attachments. The following file formats are supported; Microsoft Office files: Word (docx, doc), Excel® (xlsx, xls), PowerPoint® (pptx, ppt) and others like: JPG, BMP, PNG, GIF, TIF, TXT,TIFF, RTF, and JPEG.
Advantages:
  • This app with a clean interface is simple to use.
  • Most file formats are supported to convert to PDF.
  • The PDF documents created are of high quality.
Disadvantages:
  • It will crash sometimes.
  • You need to buy the paid version.

2. Sonic PDF Creator

sonic-pdf-creator.jpg
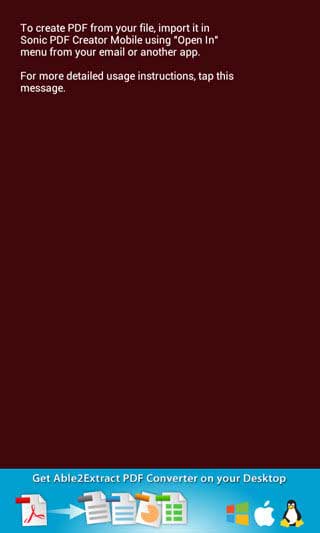
Sonic PDF Creator is available for Android smartphones and tablets and provides PDF conversions. You can create PDF documents from your Microsoft Office files for free. All you need to do is to select your document on your Android device and open it using Sonic PDF Creator. Then you just need to wait for the result. The PDF files generated will be automatically saved on your phone until you delete them. And Sonic PDF Creator also allows users to easily share or preview the generated PDF files.
Advantages:
  • This PDF creator is free.
  • The creation process is very fast
Disadvantages:
  • It needs a working internet connection.
  • It supports only Microsoft documents.

3. PDF Maker

pdf-maker.jpg
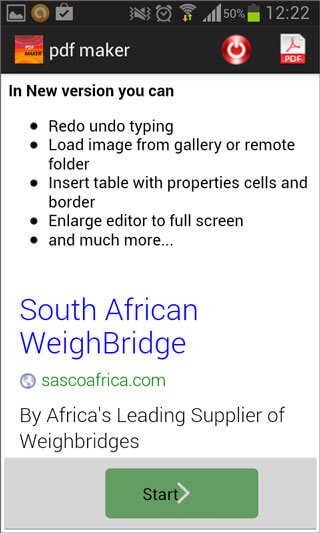
PDF maker for Android smart phones and tablets is a high rated PDF tool. You can instantly create PDF files right from supported file formats Microsoft Office on your phone. And it is more than a PDF creator, users can add images into the PDF file, adjust character size, insert text, color the text and delete the text. It is a PDF editor on the go.
Advantages:
  • Users can edit the PDF documents with this app.
  • It is free to use.
Disadvantages:
  • It does need a working internet connection.
  • It supports only Microsoft Office documents.

4. PDF Creator

pdf-creator.jpg
PDF Creator is developed by Merqde. To create PDF documents, users have to type in the text and when you tap on the 'Submit' button, it opens a web page that immediately converts the file to PDF and then downloads immediately.
Advantages:
  • Users are able to create PDF documents directly without creating word files.
  • It is also free to use.
Disadvantages:
  • You need an internet connection because of the online conversion.
  • It doesn't support creating PDF files from local documents.

5. Cam Scanner-Phone PDF Creator

  • cam-scanner.jpg
Cam Scanner works as a scanner and a PDF creator at the same time. You can use your phone camera to scan any document and save as a PDF. It has features for editing as well as OCR,Optical Character Recognition which is able to extract text in document images for editing. Documents are also easily shared within the app via social media or email attachments. It also allows for Air Print to print to PDF documents directly. You can collaborate on documents by inviting your group and they will be able to view and comment on them.
Advantages:
  • Users can scan any documents to PDF.
  • OCR feature will get all text from PDF without omission.
  • Sharing documents with colleagues or friends can be done in the app.
  • Users are able to edit the documents with this app.
  • After creating PDF, it enables users to secure the documents with passcode.
Disadvantages:
  • Free version has advertisements and users need to upgrade to paid version to remove ads.
  • Free version has limitations on some features and the file size, like an invite of maximum 10 collaborators.

How to hack Pes 2017


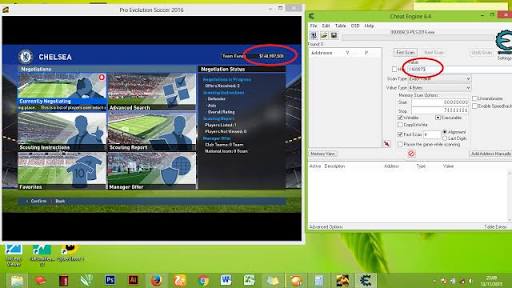
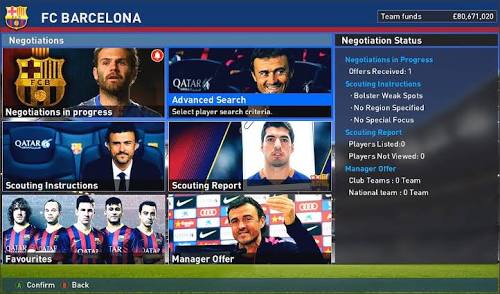
1. Install cheat engine as usual . Then for a review of PES 2016 , PES 2016 display settings Andari Being window and resized to 800x600 .


2. PES 2016 is open as usual , then ENTRY To master league - negotiations


3. Open the cheat engine Andari

4. See how funds Term Have Yang Anda , said then type the numbers in the cheat engine , remove two zeros behind ( such as images )


5. Click the "first scan"


6. Double click on the part and circled in red .


7. Click on the marked arrows.

 8. Press enter Change the numbers so 999999999 ( 9 digits 9 ) , and then press enter again . then , it would be like this .

go to PES again , open the " Currently Negotiating "

 $99.999.999.900 

Friday, March 10, 2017

How To Show Colorize Address bar in Blogger Template

 
Matching header color is a new feature of latest Android OS. It works mainly on Android Lollipop and updated version of Android OS. The main function is if your Blogger template color is red then mobile browser’s header will turn into same color. But this will work only on Google chrome browse of any latest Androind devices.


How to add this feature on Blogger Template?

SolutionLane Have that covered


  1. Log in to your Blogger Account and Go to Template Edit Html


  2. Click on -> -> Ctrl + F

Now find the by pressing Ctrl + F (Windows) or
CMD + F (Mac)


 3. Copy the script from below and Paste it above/before ]]></b:skin>

Please alter the with different hex color.
Finally hit the button to apply this feature on Blogger template.

However your template may have different color so you need to add different color code. Don’t worry you can use colorpicker to get hex color code and alternatively you can use any Photo editing tools like Photoshop to get the color code.
I hope you have easily applied this trick on your Blogger template. But if you need any further help or you have any feedback then please feel free to leave a comment below. Thank You.

<meta content='#08C6FD' name='theme-color'/>
<meta content='#08C6FD' name='msapplication-navbutton-color'/>
<meta content='#08C6FD' name='apple-mobile-web-app-status-bar-style'/>

Script Double click to selection | Use Ctrl+C to Copy

  • Customization
  • Change #08C6FD to your preferred colour, if you need help with hex colour, leave a comment and SolutionLane will send you the preferred colour of your site/blog.

Thursday, March 9, 2017

HOW TO START UP A BLOG (Step by Step Guide)


So, are you wondering how to start a blog? I’m so glad you’re here! My goal is to explain the necessary steps to get off to a good and successful blogging start, no technical experience required. This is the site I wish I had when I started over 12 years ago.

YOU CAN PAY A SOLUTION LANE AGENT TO HELP CREATE A STUNNING BLOG FOR YOU, OR YOU CAN ALSO FOLLOW OUR TUTORIAL AND DO IT YOURSELF.
I created my first blog in 2004 with zero computer experience. It took me forever to figure it out. (Let’s just say I googled until I nearly lost my eyeballs.) This guide contains what I learned along the way and is especially for those who want step-by-step instructions in an easy and simple format.

Why start a blog?

There are many reasons you might consider it. Here are a few popular ones:
  • Make money while working from home. I make a full-time income blogging and many others do the same. Making money with a blog is hard work, but the barrier to entry is low, making it very low risk.
  • Author a book. It’s no secret. These days, publishers rarely work with authors who don’t have an online presence. The reason is simple: it’s a lot easier to sell books to people who already know you. A blog is one of the easiest places to start.
  • Get more exposure for your existing business. A blog gives anyone, from individuals to large companies, the ability to reach a large number of people at very little cost.
  • Just write. If you want to write, share your story, encourage others and build a community, a blog is a great place to do that.

Do you see yourself in any of those? Can you see how you would benefit from a blog? Let’s get you up and running!

The 6 basic steps to start a blog

These are the main sections we’ll cover. Don’t worry, I’ll walk you right through.
  1. Decide what to blog about
  2. Choose a blogging platform
  3. Find a host
  4. Pick a domain name
  5. Install WordPress
  6. Design & use your blog!

Step 1: Decide what to blog about

If you’re part of a business, company or organization, this step will be easy to determine. Your blog should be related to the product(s) or service(s) you provide, or the cause you promote.
If you’re an individual, you have more flexibility with topic choice. I already explained in detail how to decide what to blog about, but the main things to remember are:
  • Blog about something you enjoy.
  • Blog about something with plenty of room for discussion.
  • Most importantly, choose a niche in which you can establish yourself as an authority.
The goal for any blog is to become the go-to resource for its topic or niche.

Step 2: Choose a blogging platform

There are many services you can use to start a blog or website. You may be tempted to use a free service, but know you’ll be limited, and in some cases, quite severely. You get what you pay for, as they say. Using a paid-for service isn’t expensive. It’s a no-brainer in my opinion.
Of the many blogging platforms out there, WordPress is, by far, the most popular (source).
I use WordPress myself and appreciate its flexibility, functionality, ease of use and large community of people who share tools and ideas. It’s an excellent choice. And don’t worry, if you want a website without a blog, WordPress makes it easy.
Caution! Within WordPress, you have two options. People are often confused by the two so I’ll mention them here:
  • Hosted WordPress blogs are often referred to as “WordPress.com blogs.”
  • Self-hosted WordPress blogs are often referred to as “WordPress.org blogs.” (recommended)
This guide outlines the steps to start a self-hosted WordPress blog.

Step 3: Find a host

A host provides server space for your site. Put simply, this allows others to find your site on the internet.
Disclosure: Because I am a paying customer for over 10 years, some of the links below are referral links, meaning, at no additional cost to you, I will earn a commission if you make a purchase.
Ready? Start by clicking here to go to Bluehost (this link will open in a new window so you can reference these instructions as you work). I have been a paying customer of theirs for over 10 years.
Once the page opens, click the green Get Started Now button.
Bluehost homepage
By the way, the images you see here may vary slightly from the ones you see on your screen. This is because Bluehost never stops making site improvements. You might even catch them in a sale! Don’t worry, the general process is the same.

Select your plan

Choose the plan you’d like to start with. I typically go with the Plus plan because you get more unlimited features. Note that all plans come with one free domain (for one year) which is good. I’ll talk about choosing a domain in a minute.
If your budget is super tight (I’ve certainly been there!), go ahead and choose the Basic plan. You can upgrade at any time.
Click one of the green “select” buttons to move to the next step.
Bluehost plans and pricing

Step 4: Pick a domain name

A domain is a web address. For example, AmyLynnAndrews.com is my domain. You may or may not already have a domain. On this screen you’ll either choose a brand new domain or enter your existing domain.
Choose a domain at Bluehost
If you don’t have a domain, enter a new domain name on the left. (See tips for choosing a domain below). Make sure .com or the correct extension of your choice is selected from the drop down menu beside it.
If you’ve already registered a domain name, enter it on the right (don’t worry, it won’t mess things up if you’re using the domain elsewhere, this only identifies your account for now).
Click the blue Next button.
Tips for choosing a domain name:
  • The goal is to make it easy to remember and easy to share!
  • Go with a .com whenever possible. People always assume .com before other extensions like .net, .org, .co or others.
  • Make it easy to say and spell.
  • Don’t include hyphens, numbers, obscure terms or confusing strings of words.
  • If you’re not sure what to use, your name is a safe bet to start.
  • Be creative or try a phrase if you’re having trouble finding an available name.
  • Read more tips here if needed.

Enter your account info

On the next page, enter your account info. Make sure you use a working email address because this is where your login information will be sent.
Bluehost account info

Select an account plan

Under Package Information select your Account Plan. Choose a package based on how far in advance you want to pay. Please note, Bluehost bills one, two or three years at a time, but as you can see, it works out to a very reasonable monthly amount. Not bad for your own blog or website, right?
Choosing a hosting package

Should you choose extras?

I always skip the other add-ons except Domain Privacy Protection. This protection keeps any personal information private. The only time I would skip domain privacy is if you are using a business address and don’t mind if it’s visible to anyone who looks up your domain. If you’re using your personal contact info (home address, phone, etc.) to register your domain, I highly recommend domain privacy.
Note: the Domain Privacy option only shows up if you registered a new domain above. It will not show up if you used a transfer domain.
The total is the amount you’ll pay today. You won’t have to pay again for 12, 24 or 36 months, depending on the account plan you chose.

Enter your billing info

Fill in your billing information, confirm that you’ve read the fine print and then click Submit.
Purchase hosting submit

Skip the upgrades

Continue on to complete your purchase. You’ll be asked if you want to add any upgrades. I just skip them.

Check your email for login info

After completing your purchase, check your email. You’ll find a welcome email from Bluehost with your control panel (cpanel) login info. Keep this information for future reference.

Log in to your Bluehost cpanel

Go back to Bluehost and click the login button in the top right corner of your screen. (Alternatively, you can use the link to your cpanel contained in the welcome email you received above.)
Bluehost cpanel login
Enter your cpanel login info from the welcome email. Select the “hosting” tab if it’s not selected already.
bluehost login panel

Step 5: Install WordPress

Once logged into your cpanel, click the Install WordPress icon under Website Builders.
Bluehost cpanel WordPress install icon

Start the WordPress install

Next you’ll get a window that looks something like this. Click the Install button (it may say “Start”) to begin the WordPress installation process.
Start the WordPress installation process

Choose where to install WordPress

Choose your domain from the dropdown menu if it’s not already chosen for you. Leave the directory field blank unless you have a good reason to create a subfolder, which is unlikely if you are just starting. Click Check Domain.
wordpress domain install

Enter your WordPress user info

Check the box next to Show advanced options. Enter your Site Name or Title (e.g. Amy Lynn Andrews, Dave’s Blog, Sally’s Song Factory, etc.). This is different than your domain which ends in .com or something similar.
Choose an Admin Username (do not use “admin” as your username). Choose a password. These will be what you use to login to WordPress once it’s installed.
Enter your email address (again, all site information will be sent here). Read and agree to the terms. Click the Install Now button.
Advanced options in Bluehost WordPress installation

Note your WordPress login information

After WordPress has been installed, you should see the “Status: success” indication. Take note of the information to access your new WordPress site. This information will also be sent to you via email.

Recap

At this point, you will have received two welcome emails. The first is the login info for your Bluehost hosting account. The second is the login info for your WordPress account. Keep both, although from this point forward, you’ll be using your WordPress login information much more frequently.

Did you register a new or existing domain in Step 4?

If you registered a new domain in Step 4…

You (or anyone) can now type your domain into a browser and your WordPress site will appear.
Clicking on the Site URL link in your WordPress welcome email will take you to your brand new, live website.
Clicking on the Login URL link will take you to the WordPress login page where you can enter your WordPress username & password and get into the back end of your WordPress site. This is where you will write your posts.
Skip down to Step 6 for next steps.

If you used an existing domain in Step 4…

Your existing domain will not display your new site until you change your name servers wherever your domain is currently registered. Changing your name servers points your domain to this new site.
IMPORTANT! As soon as you change your name servers, your domain will bring visitors to this new site. Therefore, if you are currently using your domain on another site, do not change your name servers until your new site is set up and ready to go. In the meantime, you can still access your new WordPress blog via a temporary URL. You may have received one in your welcome email from Bluehost. If you didn’t, simply call them and let them know you need a temporary URL for your new site.
To change the name servers where your domain is currently registered, first note your new Bluehost name server information:
  • ns1.BlueHost.com
  • ns2.BlueHost.com
Next, go to the registrar where your existing domain is currently registered (Namecheap, GoDaddy, etc.). You will need to enter the above information in the appropriate place. This varies among registrars so I recommend you call them if it’s not clear.
Whether you registered a new domain or transferred an existing one, you will know you have been successful if you can type your domain into any browser and your site appears.

Step 6: Design & use your blog!

Congratulations! You are now the proud owner of a self-hosted WordPress site. There are many things you can do at this point. Blogging is about learning as you go and tackling things as you can. Here are some things you might want to explore.

Do you want to learn WordPress basics?

Visit my Contents page for an organized list of all my tips, tools & tutorials. Check out the WordPress section in particular. If you work your way through this list of articles, you should have a good handle on the basics from publishing a post, adjusting your settings, understanding permalinks and more.

Do you want to tweak your blog design?

If you’re like most, you’ll want to customize your design a bit. Here is my post about choosing a WordPress theme and what I use. You might also want to check out my post about blog design dos and don’ts.

Do you want to learn how to get traffic to your blog?

I’ve written many suggestions in this post.

Do you want to make money blogging?

Read my post about ways bloggers make money here. Don’t forget to read my list of things to do before you start making money online.

Do you want help keeping up with all the latest blogging news?

Sign up for The Newsletter. It’s hard to keep up with the latest info about blogging, online business and social media. I wade through the internet and send out bite-sized tips every Saturday morning. It’s completely free and very popular.
Interested for our works and services?
Get more of our update !